The simplest static site generator

Static site generators are the best way to produce a simple, secure, super fast website.
But the generators themselves aren't all that simple, and it can be tedious to choose one of the many, learn it, and get started. Here's a quick way to roll your own with nothing but the basic skills you might have learned as a webmaster in 1999.
What are we trying to do here?
You want to
- have a great choice of themes, look-and-feel, customisability…
- be able to have some kind of templating system, so you can change things in one place and they take effect across the website.
- easily find people who can work on it
- have a choice of hosting, and not be locked-in to a particular vendor
- not worry about security, patching PHP, servers, Russian hackers
Ladies and gentlemen, I give you… PHP.
What?
I know, we just said we didn't want to run PHP.
But we're not going to run it on a server. We're going to use it to build a static website, that can then be deployed anywhere you like (HostGator, S3, Netlify, your friend's spare server… doesn't matter).
Here's how.
Basic setup
All you need are basic, common web design tools; PHP and a webserver. Most systems already come with those, but the setups vary between OS versions, so here's a quick, simple guide that should work on a Mac without messing with your OS config.
Follow along and you'll be up and running in minutes.
If you're on a Linux machine you've already got PHP and Apache set up sensibly; have a look at the docs for those and you can bypass this section and just use them.
You need Homebrew, the Mac open source package manager - if you have it, skip this step.
If not, pop open a Terminal and paste in
/usr/bin/ruby -e \
  "$(curl -fsSL https://raw.githubusercontent.com/Homebrew/install/master/install)"
Now use Homebrew to install what we need:
brew tap homebrew/services; brew tap homebrew/dupes
brew install php72 --with-fpm --without-apache; php -v; php-fpm -v
brew services start php
brew install caddy
mkdir -p $HOME/Sites
cat > /usr/local/etc/Caddyfile << EOF
localhost:2015
root $HOME/Sites
fastcgi / 127.0.0.1:9000 php {
  ext .html
  index index.html
  split .html
}
log /usr/local/var/log/caddy.log
errors /usr/local/var/log/caddy_errors.log
EOF
brew services restart caddy
That gives us PHP, and Caddy (a quick-n-easy webserver that'll work with minimal configuration). You'll put your HTML files in the Sites directory in your home dir.
Now we need a website.
Create your site
Page 1
I'm going start with a minimal, plain HTML template so you can see what I'm doing. In the real world I'd grab a Bootstrap template from Templated or somewhere similar and spend some time tweaking the styles.
Open your favourite text editor, and edit the file ~/Sites/index.html
Make it look like this:
<html>
<head>
    <title>My first site</title>
</head>
<body>
    <header>
        <h1>Welcome to Page 1</h1>
    </header>
    <p>Some paragraph text with <a href="page2.html">a link to a second page</a></p>


    <footer>Copyright me, 2018</footer>
</body>
</html>
Save it.
Open a web browser to http://localhost:2015 and you should see your lovely new web page.
Page 2
Copy index.html to page2.html and edit it.
Change the h1 tag to be "Welcome to Page 2", save, refresh your browser and click the link a link to a second page - you should see "Welcome to Page 2".
Now, evidently, if you were to make a change to, say, the title, then you'd have to make it in both files to retain consistency. Let's fix that by adding some templating.
Change index.html so it looks like the following (add the <?php … ?> bits at the second, and third-last lines)
<html>
<?php include '_head.html' ?>
<body>
<header>
    <h1>Welcome to Page 1</h1>
</header>
<p>Some paragraph text with <a href="page2.html">a link to a second page</a></p>
<?php include '_footer.html' ?>

</body>
</html>
Make the same changes to page2.html.
Now create a new file, _head.html in your editor, and paste in:
<head>
    <title>My first statically generated site</title>
</head>
And put the following in _footer.html:
<footer>Copyright you, 2018</footer>
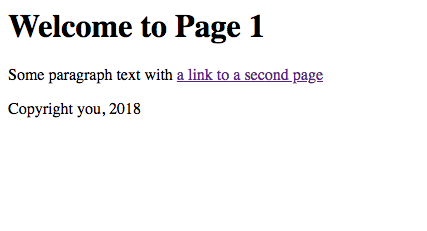
Refresh your browser, and let's see what you've got (note the dynamically replaced footer message!):

"Build"
Okay, so now we have a nineteen-nineties level PHP website, but with templating, running locally in PHP behind a webserver.
"That's not a static site!", I hear you shout.
Here's the magic.
Back in the Terminal…
mkdir dist
cd dist
wget -r http://localhost:2015
Have a look at the contents of the dist directory.
That's your static site!
Yes - it seems incredibly simple - but it works.
No compile, no build, no fancy packaging. Just the basics.
Deploy
Copy the files in dist to your host of choice.
Like before, I'll use Netlify, but Amazon S3 or [insert $3/month hosting company here] would be just as good.
First make sure you've got a (free) Netlify hosting account - you can get one here if you haven't already.
Once you're logged in, you can make it live using drag-and-drop; simply drag the whole directory you unzipped into the Netlify "Deploy" box in your browser. Watch the video if you get stuck!
Once that's done, open the auto-generated URL they give you, to see your site live on the internet!
Taking it further
One other thing that can be tricky about static sites is, well, they're static. It's tough to build in dynamic functionality like e-commerce when all you have is HTML.
That's where Trolley comes in. It's a lightweight, pop-up shopping cart that works brilliantly on static sites. If you need to sell products (including digital downloads), take deposits, donations or one-time payments, check it out. It's free to start - commission only, so if you don't sell anything you don't pay anything.
