JAMstack - Deploying Hugo behind CloudFront
Hugo is one of the most popular static site generators in 2019, and is well-loved in the JAMstack community.
Hosting on Amazon S3 is almost free, very secure, fast and highly reliable - perfect for static sites.
Using S3 gives you super-easy access to Amazon CloudFront, the CDN with free SSL.
Here's a quick guide to getting a simple Hugo site running, protected by SSL, in only a few minutes.
Overview & pre-requisites
You'll be using
- Hugo for static site generation
- Amazon S3 for hosting
- Amazon CloudFront for SSL (and caching)
So before you start, make sure you've got an Amazon AWS account (it's free / cheap if you haven't got one)
Creating a skeleton site with Hugo
I'm going to assume some basic familiarity with Hugo. If you haven't used it before, then follow the install guide and then go through the tutorial.
Once you understand the basics, and you're in a position where executing hugo --help shows you something useful, then we can create your new site.
hugo new site mysite
Hugo creates you a directory structure like this:
.
├── archetypes
│   └── default.md
├── config.toml
├── content
├── data
├── layouts
├── static
└── themes
Getting a theme
There's a nice single page app theme available here: https://github.com/SteveLane/hugo-icon/ Let's install it into our Hugo site
cd mysite
git clone https://github.com/SteveLane/hugo-icon.git themes/hugo-icon
cp -Rf themes/hugo-icon/exampleSite/* .
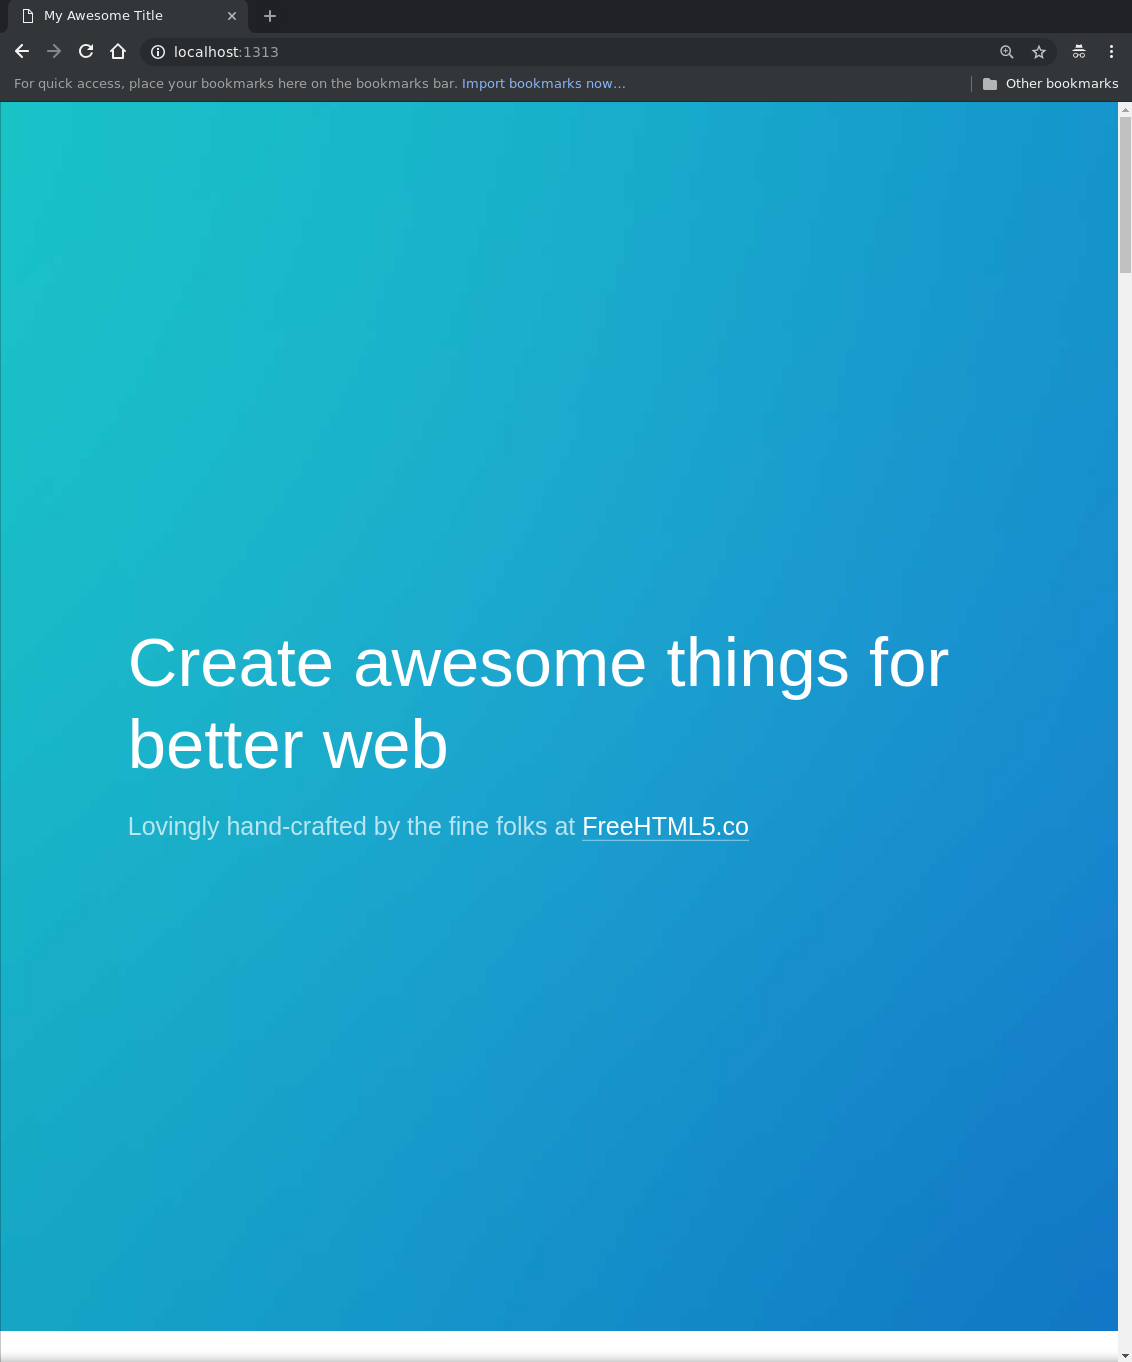
Try it out
Run Hugo to serve a local version of the site:
hugo server -D
and load up a browser on http://localhost:1313
You should see something similar to this:
Populating some basic content
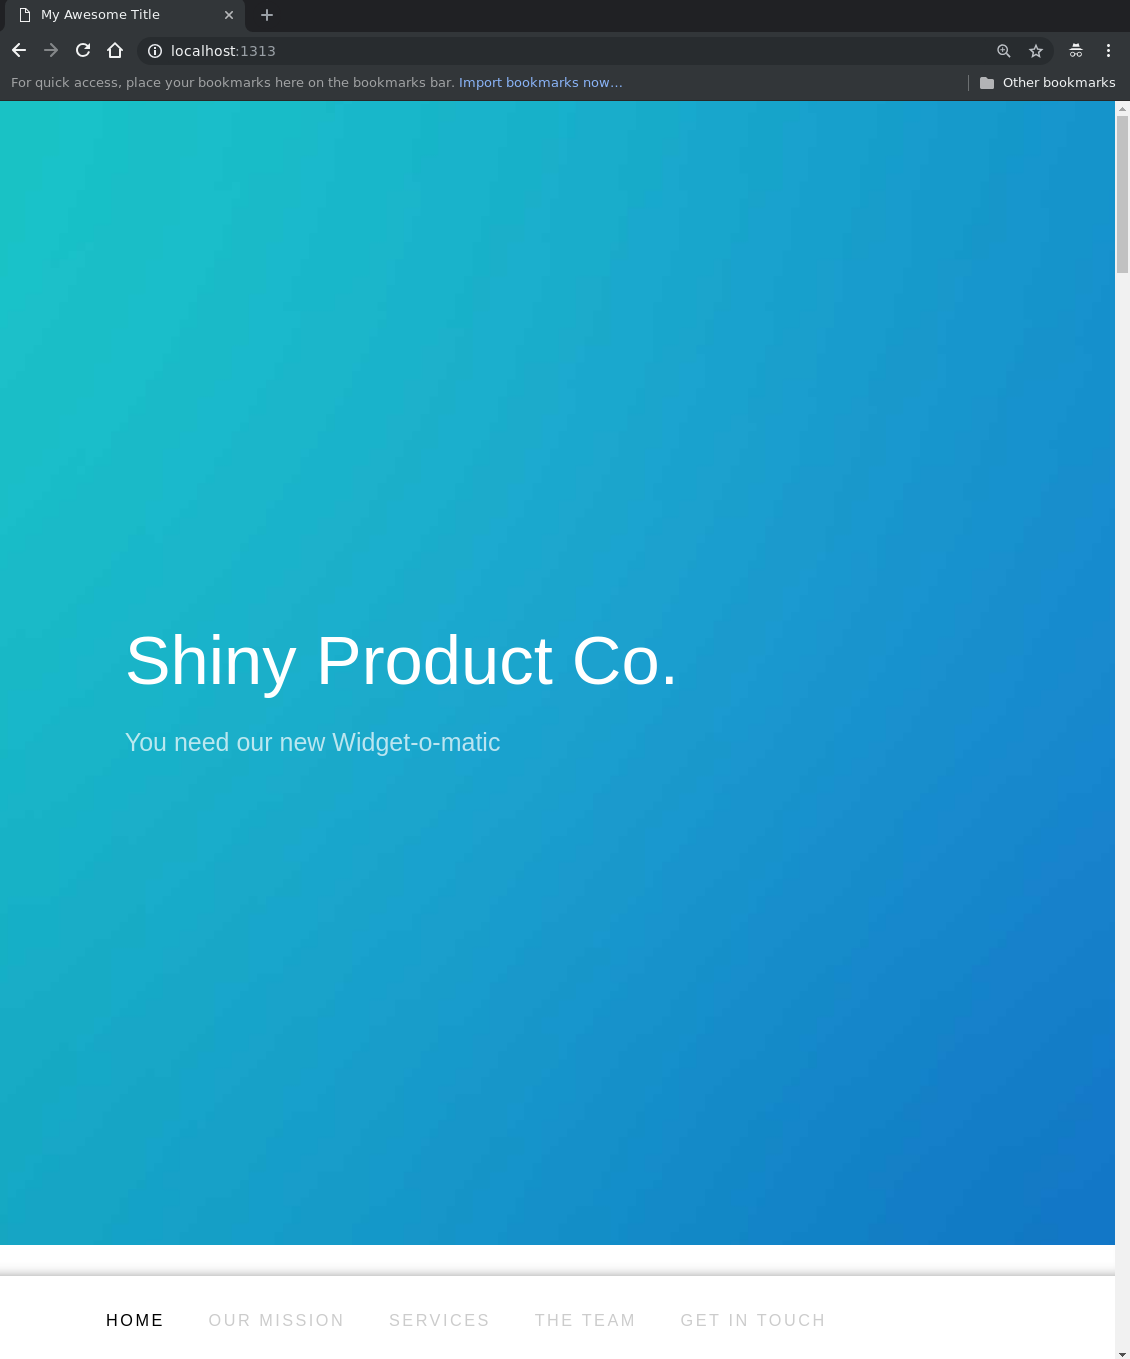
Edit the file config.toml and go through it, changing the content sections as appropriate.
# Hero section (from here on is for icon theme)
[params.hero]
  img = "images/hero_bg.jpg"
  title = "Shiny Product Co."
  description = "You need our new Widget-o-matic"
Reload Hugo (possibly by Ctrl-c in the terminal and rerunning hugo server -D) and you should see your updated site:
Get the Amazon CLI tools
If you haven't got these already, you'll need them to be able to sync the built website to your S3 bucket.
pip install awscli --upgrade --user
And then set the contents of ~/.aws/credentials to be your AWS access key settings. It's best to create a new user in the AWS console just for this and give them appropriate permissions. Doing this is outside the scope of this post - but there are really good instructions here
If you want, you can skip the command line bit and just manually upload files to S3 through the web UI, but it's really slow - make the effort to set up the command line tools and it'll pay off.
AWS_DEFAULT_REGION=us-east-1
AWS_SECRET_ACCESS_KEY=YOUR_SECRET_KEY
AWS_ACCESS_KEY_ID=YOUR_ACCESS_KEY
Setting up an S3 bucket for static site deployment
Back to the AWS web console again and head to the S3 section
Enable the Static Website Hosting option. Make sure to set the Index document to index.html
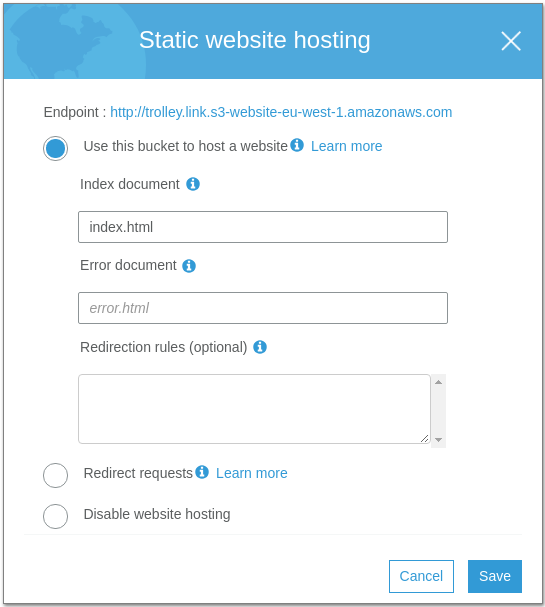
Now go to Properties -> Permissions and edit the bucket policy to something like this (change the bucket name)
{
 "Version": "2012-10-17",
 "Id": "PublicBucketPolicy",
 "Statement": [
  {
   "Sid": "Stmt1482880670019",
   "Effect": "Allow",
   "Principal": "*",
   "Action": "s3:GetObject",
   "Resource": "arn:aws:s3:::YOUR_BUCKET_NAME/*"
  }
 ]
}
Setting up CloudFront and SSL for your static site
Time to setup the caching CDN - CloudFront. This is also how you get SSL for free!
Go to the CloudFront console and hit the Create Distribution button, then "Get Started" under Web on the next screen.
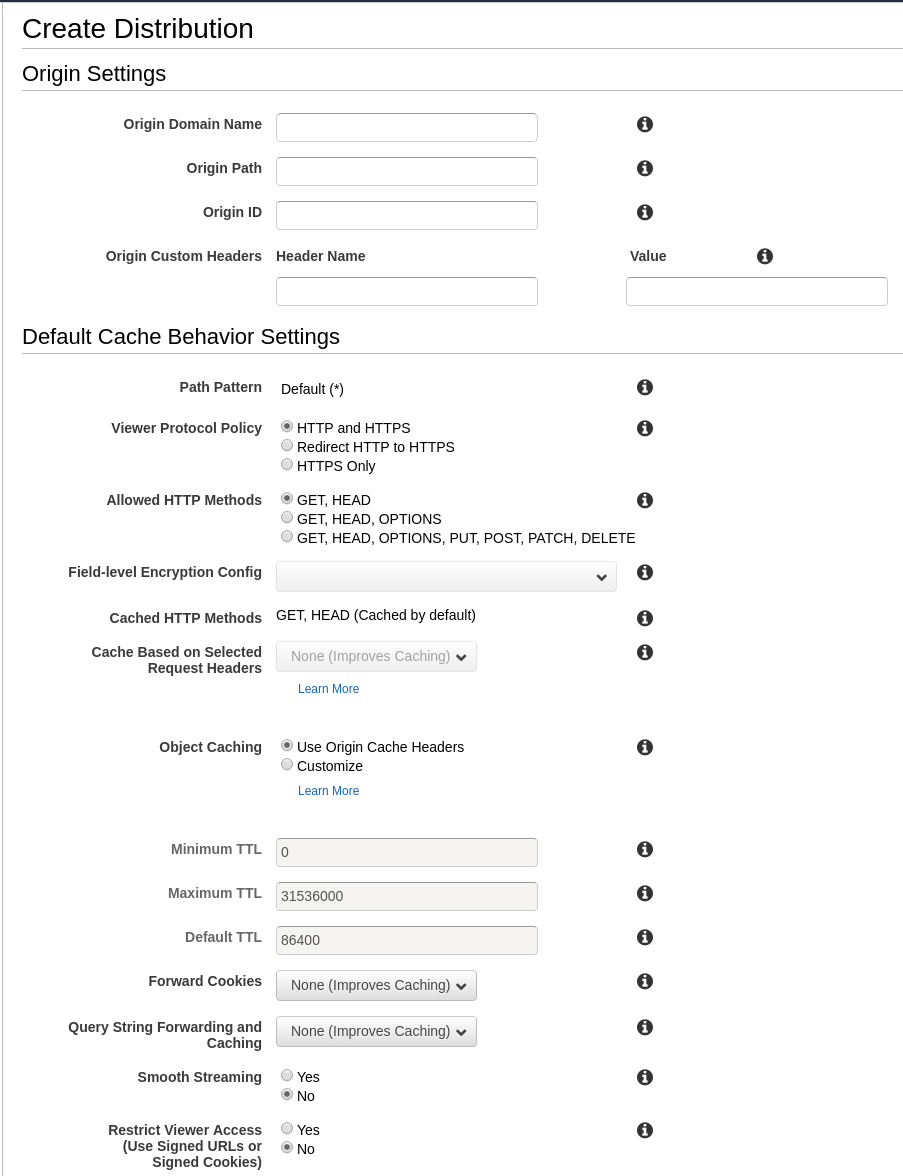
Set the Origin Domain Name to be the S3 bucket we're using.
Set Viewer Protocol Policy to be "Redirect HTTP to HTTPS"
If you wanted to use a custom domain, e.g.
www.mydomain.comto host your site, you'd ensure you had a domain created in Route53 now, then fill in Alternate Domain Names withmydomain.comandwww.mydomain.com. Right now we're just going to host from the default*.cloudfront.netdomain to make things easy.
Scroll down and find Default Root Object. Enter index.html here.
Click the Create Distribution button at the bottom and wait til it reports it's finished.
Building and deploying your Hugo site to S3
Time to build your site for deployment.
In your terminal, enter the root of the project (e.g. mysite) and execute:
hugo
If you have a look in the directory now, you'll find a subdirectory called public, containing a fully built static site that you can load in a browser by opening index.html.
Now sync (copy) the files to the S3 bucket:
aws s3 sync public s3://BUCKET_NAME \
  --acl public-read --cache-control "public, max-age=86400"
Now open your web browser to the URL listed on the CloudFront console - it'll be something like d4l8iqw04z8zhn.cloudfront.net - and you should see your site, running fully secured on HTTPS.