A subscription email newsletter from scratch
Email newsletters are king
Increasing numbers of authors are successfully monetising their lists directly, by offering premium subscription models.
Historically this has been difficult - or expensive - to do. Now it's possible to do it all in half an hour.
Here's how. We'll start with nothing and end up with
- a website,
- an email newsletter,
- payments
Then all you have to do is write the content :)
Get yourself a coffee and clear half an hour in your calendar; that's all it will take.
We're going to use
- Mailchimp for creating the newsletter
- Stripe for payments
- Trolley for subscriptions and signups
- ZeroStatic for a clean, simple website theme
- Hugo to generate the website
- Netlify to host it
- and Zapier to glue some things together.
By the end you'll have a new website with a clean theme and a button that allows users to subscribe, and once they've paid will automatically add them to your Mailchimp newsletter!
Basic account setups
You'll need a Mailchimp account and a Stripe account straight away; if you don't have these, go and sign up now. They're both very quick and free to sign up.
Remember - if you're just getting started, you don't need a business bank account to use Stripe!
If appropriate, you can sign up as a sole trader no problem at all and be paid into your personal bank account.
Create a list in Mailchimp
Mailchimp uses the concept of a List - a set of people, to whom you send Campaigns (emails). Once you've got a Mailchimp account, go into Mailchimp and create your first List by clicking Lists in the top navigation, then Create List.

Fill in the basic details, set any notification preferences you want, and Save it.
Create a Zapier webhook to add people to the Mailchimp list
Zapier is a tool that helps you glue other tools together - like Internet duct tape.
It's what's going to let us push email addresses into Mailchimp autoamtically when someone pays to join your newsletter.
Follow along below to create as "Webhook" that your website and Trolley will use to "zap" the email addresses into Mailchimp.
First sign up for Zapier if you don't have an account (it's free for what we need)
Now go to the Zapier dashboard and create a new Zap, selecting Webhooks by Zapier as the Trigger app and Catch hook as the type.
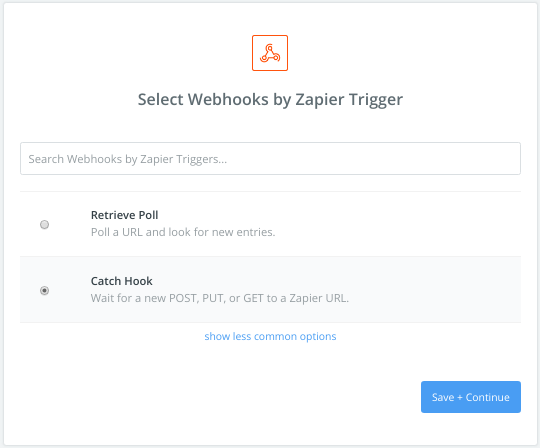
Click through the next screen; the default is fine.
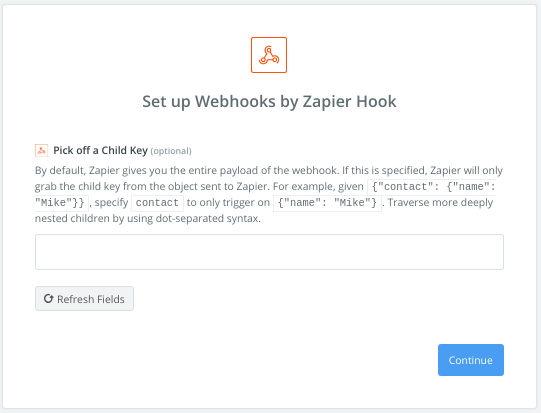
Next, we need to send some data to Zapier to prove that the webhook is set up.
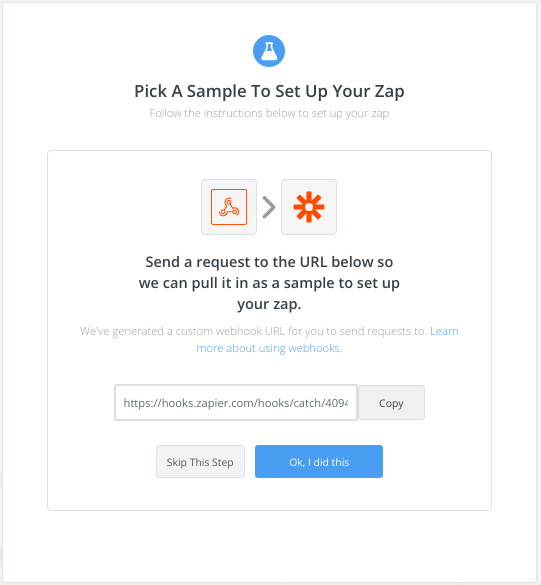
Grab the URL from Zapier and use it in the following command from your terminal.
curl -X POST -H "Accept: application/json" \
  -H "Content-Type: application/json" \
  -d "{\"email\":\"test@some-domain.com\"}" \
  THE_URL_FROM_ZAPIER
Then in the Zapier wizard, click OK, I did this
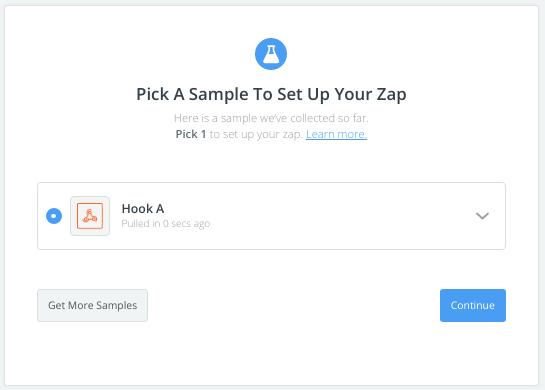
Zapier should detect the test data and switch to showing you something like this.
Select Hook A and click Continue.
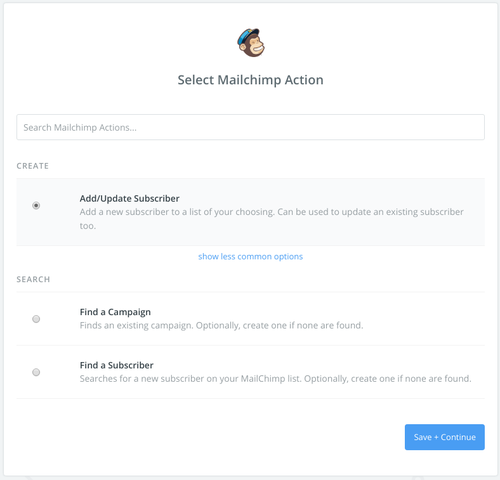
Now click Add a Step in the left hand sidebar to add the Action that your webhook trigger will fire. Choose Action/ Search and select Mailchimp.
On the next screen, tell Zapier that you want to Add / Update Subscriber when you receive the webhook that Trolley will send.
Now let Zapier have access to your Mailchimp (if it doesn't already) by using the Connect an Account button

You'll be presented with this final summary configuration screen.
In the first field, List, select your Mailchimp subscriber list.
In the second field, Subscriber Email, click the + sign and select the email value that Zapier detected in our test data.

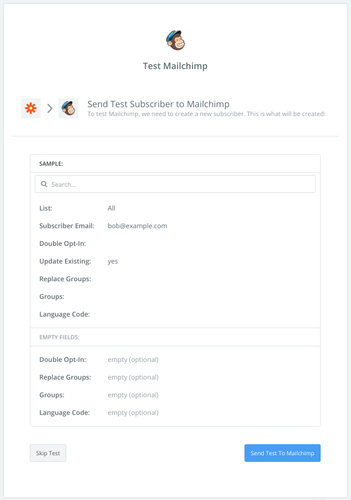
Now you'll get the chance to test it.
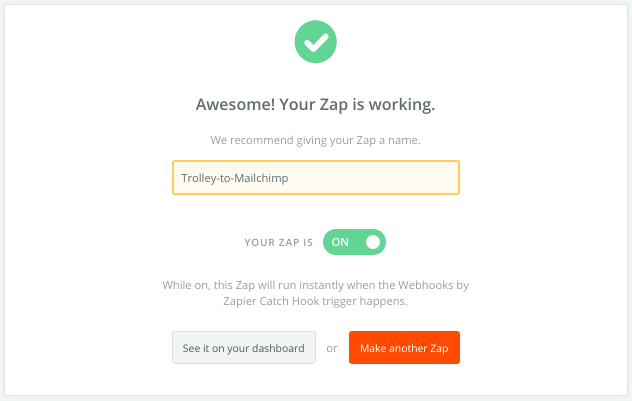
Finally, turn on the Zap and give it a name.
Creating a website
We're going to use Hugo, a modern, super fast static site generator, to quickly build a website based on an existing theme. If you don't have Hugo yet, then install it now.
Zerostatic provide slick, responsive and modern-looking themes for Hugo (and Gatsby & Jekyll, two other site generators). Even better, they have some free themes to get us started!
Go to the theme page for the Zerostatic Hugo Hero theme and click the Download button. This will take you to the GitHub page for the theme, where you'll find easy-to-follow instructions for installing the theme into a new site.
The short version is (instructions are for macOS / Linux) do this:
hugo new site mynewsite
cd mynewsite
git clone https://github.com/jugglerx/hugo-hero-theme.git themes/hugo-hero-theme
cp -a themes/hugo-hero-theme/exampleSite/. .
rm -rf themes/hugo-hero-theme/.git
then update the values in the config.toml file as follows:
baseURL = "/"
themesDir = "themes"
theme = "hugo-hero-theme"
Now change the homepage content to something about your product by editing content/_index.md
---
title: 'Home'
date: 2019-03-01T15:37:57+07:00
heroHeading: "Bob's Newsletter"
heroSubHeading: "Bob's Newsletter provides all the latest gossip"
heroBackground: 'images/jason-blackeye-1191801-unsplash.jpg'
---
and then run
hugo -D server
and open a browser to http://localhost:1313 to see the results.
Later on you can update the rest of the copy to suit your business by editing the Markdown files in content/, but for now let's carry on with the basic setup, by setting up Trolley to give you a pop-up shopping cart that integrates with Stripe and Zapier.
Get Trolley
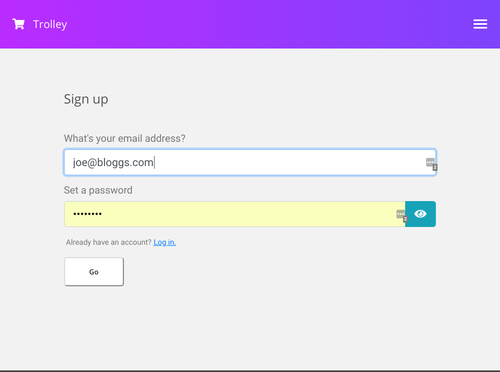
And now let's create your Trolley account. Sign up for Trolley.
It's free to create an account; Trolley takes a small commission on each purchase of your product, so Trolley only makes money when you do (this is the same way that Stripe works too)
Follow the simple prompts to connect the Stripe account to Trolley.
Set up the subscription in Stripe
Trolley gives you a pop-up cart and lets you capture subscriber details; we use Stripe to process the credit card payment and put the money into your bank account, but to keep Stripe happy we need to define the basic subscription details in their product database.
Login to your Stripe dashboard and go to Order > Products
Hit the Create product button and you'll see a form that looks like this.
Fill in the details of your Product - really the important one here is the Product Name (let's call it "Bob's Brilliant Newsletter") but you can fill in the others if you want.
Then press the blue Create Product button at the bottom.
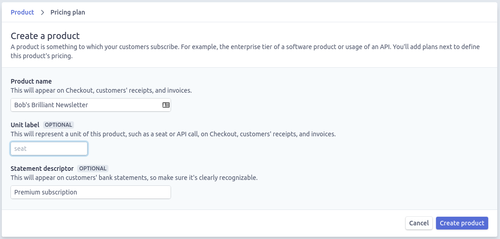
Create the Plan - this defines the billing frequency and the price of your product.
You can have multiple plans later on; for now just create a simple one; monthly for five bucks.

Press Add pricing plan and you're done with Stripe setup.
Now we're going to wire it up in Trolley (which takes 2 minutes), then it's onto your website and start selling!
Create the product in Trolley
Now that the product exists in Stripe, we can pull it into Trolley so it can be displayed on a website, emailed as a link to customers and so on.
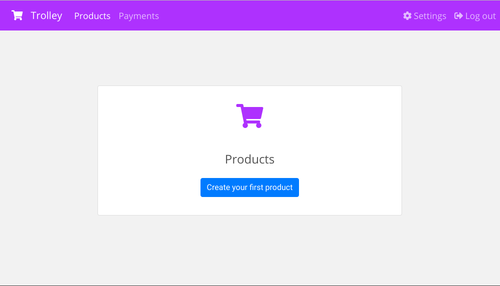
Go to your Trolley dashboard
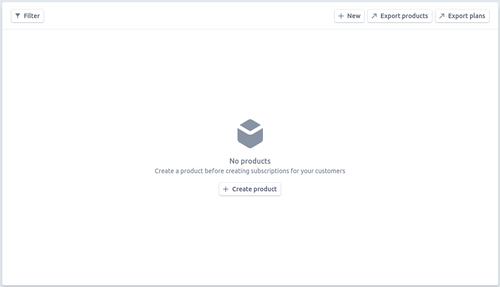
Create the product in Trolley by going to Products and hitting the Create your first product button.
You'll see this product form.
This should be nice and simple and gives you all the options you need (and nothing more!)

Fill in the basic details - name and description - and select that the product is a Subscription.
Now you'll be asked to pick from the list of Plans in Stripe.
You should see the one you created for your Newsletter; select it!
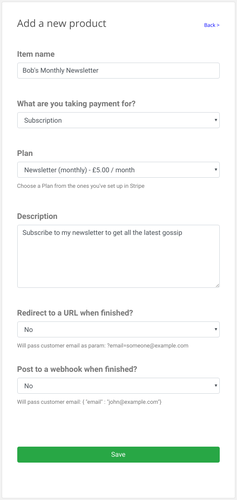
Lastly, connect Trolley to Mailchimp by selecting "Yes" to the Webhook option and pasting in the Zapier webhook link to the Webhook field that appears (e.g. https://hooks.zapier.com/hooks/catch/4094128/phcw5n/ - you used it in the sample data section above)
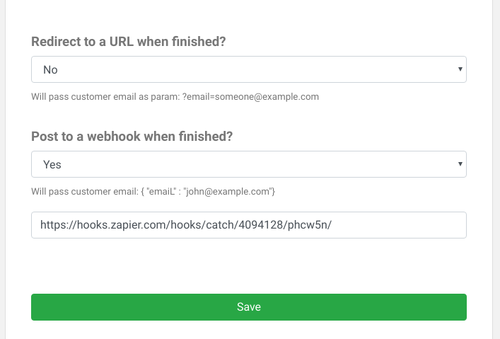
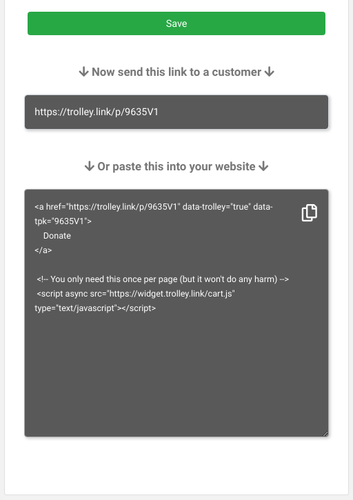
Now press Save and Trolley will give you your HTML snippet.
This is what you're going to put on your website (WordPress, static, JAMstack, any CMS…) - it's all you need to put the payment button on screen for your users and start taking payments.
Copy the snippet (either with the little Copy icon, or by selecting it and Ctrl-C in your browser)
Putting the payment button on your website
Now we've got the website, the newsletter, the product and the payments bit done. Let's glue it all together.
Open an editor, open the file themes/hugo-hero-theme/layouts/partials/hero-image-fullscreen.html and paste in the Trolley code snippet (starting something like <button data-trolley="true" data-tpk="9635V1">...) from your Product at line 6.
You should end up with something like this:
<div class="hero-image hero-image-fullscreen" style="background-image: url('{{ .background | relURL }}');">
    <div class="container ">
        <div class="hero-text">
            <span class="hero-section">{{ .section }}</span>
            <h1>{{ .heading }}</h1>
            <p>{{ .subheading }}</p>

            <button data-trolley="true" data-tpk="9635V1">
                Subscribe
            </button>

            <!-- You only need this once per page (but it won't do any harm) -->
            <script async src="https://widget.trolley.link/cart.js"
                    type="text/javascript">
            </script>
        </div>

        <div class="hero-down">
            <a href="#home">
                <svg xmlns="http://www.w3.org/2000/svg" xmlns:xlink="http://www.w3.org/1999/xlink" width="60" height="60">
                    <svg xmlns="http://www.w3.org/2000/svg" viewBox="0 0 898.75 533.751" transform="matrix(.69 0 0 .69 15.5 15.5)" fill="#fff">
                        <path d="M224.687 309.061L0 84.372l42.186-42.186L84.372 0l182.815 182.811L450 365.622l182.5-182.496L815 .63l41.874 41.874L898.75 84.38 674.062 309.065 449.373 533.751 224.687 309.06z"/>
                    </svg>
                </svg>
            </a>
        </div>
    </div>
</div>
{{ .Site.BaseURL }}
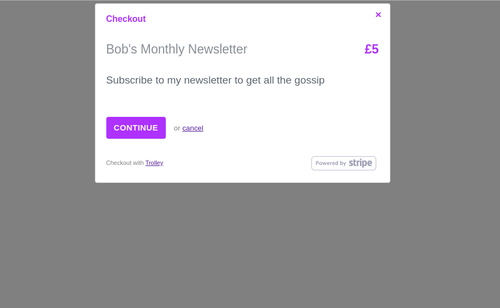
Flip back to your browser. If you kept hugo -D server running in the background, then you should see that the browser has automatically updated, and you should see a payment button on your site.

And when you click the Subscribe button, you'll get the Trolley popup, which will allow your customers to enter their credit card details and subscribe to your Newsletter.
That's it from a coding & design perspective (though like I said before, you can go and tweak the rest of the content later).
The next step is to get it live on the internet for other people to see!
Deploying the site with Netlify
First make sure you've got a (free) Netlify hosting account - you can get one here if you haven't already.
It's a simple process; first we're going to "build" your site with Hugo then we're going to put it into Netlify following the instructions here: https://www.netlify.com/docs/manual-deploys/
To build the site, go back to your terminal window where hugo -D server is running, and Ctrl-C it to stop the process.
Now type
hugo
Hugo will produce a fully static version of your site in the public/ directory.
Log in to Netlify and simply drag the whole public/ directory into the Netlify "Deploy" box in your browser.
There are lots of slicker ways to automate this (usually by putting your site in GitHub and setting Netlify up to automatically build & deploy anything you change) but this'll do to get started.
Watch this video if you get stuck.
Once that's done, open the auto-generated URL they give you, to see your site live on the internet!
The finished article
Now all you have to do is market it, validate it and turn it into a real business…
How to do that is outside the scope of this little blog, but watch this space for future posts. :o)
In about half an hour (and one coffee!) you've gone from an idea, to a fully fledged website live on the internet, with a newsletter powered by Mailchimp and subscription payments through Stripe and Trolley.
Customers should now be able to go to your website, read about your Newsletter, hit the Subscribe button, pay and be automatically added to your Mailchimp list and your Stripe customer base.
When a customer subscribes, Trolley will send you an email notification.
Next, you could think about setting up a Mailchimp campaign to automatically send a welcome email to new signups.